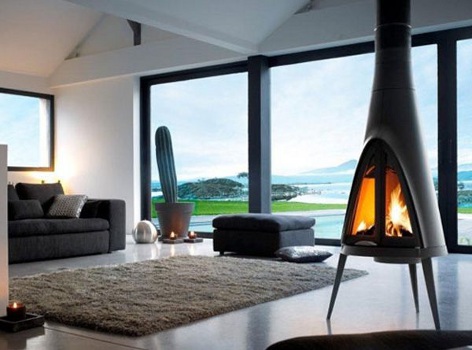
Enhance your home with the charismatic charm of freestanding fireplaces, a popular choice among homeowners. These freestanding gas fireplaces boast simplicity and easy installation and are available in various sizes, shapes, and models. With the correct information, skills, and tools, transforming your space can be a one-weekend project. Follow the steps below for a correct and safe installation of a freestanding fireplace:


Selecting the Right Place
Choosing the perfect place for your freestanding fireplace may seem straightforward, yet it can be challenging. Consider multiple factors before finalising the location. Ensure the fireplace enhances your room’s design and aesthetics, and consider proximity to existing exhaust or electrical circuits to minimise installation expenses. For optimal ease, installing a freestanding electric fireplace with gas or ethanol on an outside wall is advisable. It simplifies vent pipe design, requiring only outer wall studs for support.
Place Your Fireplace Order
When ordering & Installation your fireplace, explore various options. You can conveniently order online or visit a trusted store to view designs, sizes, and models in person. The latter allows you to measure stoves, compare them with your space, and ensure a perfect fit. Seek assistance from a sales representative to order all necessary parts, such as the exhaust pipe components, wall-to-fireplace pipe, and chimney cap.
Furthermore, you can request the manufacturer’s manual to confirm all parts, regardless of whether you buy online or from a nearby store. Additionally, a reputable company should offer returns and compensation if the product does not meet the guaranteed performance standards.
Commence Piping Construction and Assembly
Upon bringing the stove home, the next step is to build. Avoid placing the fireplace directly on the floor to ensure safety. Constructing a platform using masonry or tiles is advisable to eliminate fire risk. Alternatively, consider purchasing a pre-made platform from the manufacturer. Always adhere to the manufacturer’s guidelines, which state that you should clear combustible materials from the surroundings for added safety.
Create the Ventilation Opening
Undeniably, this step requires precision. Depending on your model, attach the venting pipe to the back or top of the stove. Connect multiple pieces of the exhaust pipe to identify where the hole will penetrate the wall accurately. Once the location is determined, use a pencil or marker pen to trace the outline of the pipe on the wall.
Ensure the absence of electrical connections in the chosen hole area you’re marking for safety. Use a drywall saw to create a square hole following your markings. Use lumber to frame the inner walls and edges of the hole. Refer to the manufacturer’s manual for precise insulation specifications regarding size and material.
Connect the Fireplace
It’s time to position your stove securely on the stand, connecting the exhaust pipe at the top or rear, depending on your model. Fasten the stove to the platform with screws. Unlock the tank by pushing the open button and fill it using a funnel (beware of overflow). A beep will caution you that you are ready to overflow the tank. Now, put the cap on the opening and securely close it. Press the button on the remote control and start enjoying the warmth.
Installing a freestanding fireplace demands patience and effort; however, you can follow the steps mentioned above to DIY install your freestanding fireplace successfully. Make sure your measurements are accurate to guarantee the success of your hard work and investment.
Final Thoughts
Installing a freestanding fireplace is a rewarding venture that adds charm and warmth to any home. Each step requires precision and attention to detail, from strategically choosing the location to assembling and connecting the components.
The sense of accomplishment is undeniable as you press the remote control and witness the flickering flames. A freestanding fireplace serves not only as a functional heat source but also as a stylish centrepiece, enhancing the ambience of your living space.
Beyond the effort invested, the result is a cozy haven that complements your home’s aesthetic. Whether opting for gas or ethanol, this DIY project promises comfort and satisfaction, making your home a welcoming retreat for family and friends.


